Cart
0
Table of Contents
- What Are the Common Mistakes When Submitting DTF Transfer Artwork
- Using the Wrong Film
- Use of Low-Resolution Files
- Forgetting to Remove the Background
- Wrong Color and Incorrect Ink Levels
- Improper Heat Pressing Procedures
- Inconsistent Curing Temperature
- Submitting a Wrong File Format
- Summary: Avoid Mistakes
What Are the Common Mistakes When Submitting DTF Transfer Artwork
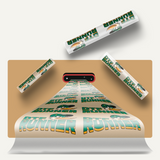
If your perfect design is ready to print, it's crucial to review some important precautions beforehand. A few common errors can compromise your designs. If you are new to this technology, you must be aware of the materials and equipment used at each stage, as errors can stem from personal mistakes, material issues, or equipment failure.
To prevent these issues, it's best to prepare for the whole process and review digital proofs in advance, as this is beneficial for eliminating potential deficiencies. At DTF Runner, we've seen everything from pixelated prints to chopped-off logos, and we are here to help you avoid these pitfalls. Let's discuss the common mistakes made when submitting artwork for DTF transfers.
Using the Wrong Film
Using a low-quality or incompatible PET film, whether by mistake or to reduce costs, is a significant error. This can lead to poor adhesion, cracking designs, or inconsistent prints. Always use a high-quality DTF transfer film that is specifically designed for your printer and inks. A film with a consistent coating ensures smooth and even ink application for the best results.
Use of Low-Resolution Files
You might find the perfect image online or quickly export a design from a phone app without checking its resolution. If the file is low resolution, the final print may appear pixelated or fuzzy. For clear, sharp results, artwork should be submitted at a minimum of 300 DPI (Dots Per Inch). A resolution higher than 300 DPI will yield an even better result.
Forgetting to Remove the Background
If you forget to remove the background from your image, it will not be transparent. Instead, you will get a solid-colored box printed around your design on the t-shirt. Be careful to remove the background of any image or logo before submission. Your print provider expects a clean file, so ensure it's properly prepared in your design software.
Wrong Color and Incorrect Ink Levels

Most printing is done using CMYK (Cyan, Magenta, Yellow, Key/Black) colors, but people often design in RGB (Red, Green, Blue), especially when using web-based tools. This can cause color shifts; for example, a neon green in RGB might print as a duller, avocado green in CMYK.
Another common mistake involves ink levels. DTF beginners often assume more white ink equals better vibrancy. However, overusing white ink can make the print feel thick and blurry, while using too little can cause designs to look faded on dark fabrics. It's essential to adjust ink ratios correctly in your RIP software.
Improper Heat Pressing Procedures
Always pre-press the fabric for 5 to 7 seconds at 300°F before applying the DTF transfer. This simple step removes moisture, flattens wrinkles, and ensures better adhesion. Additionally, using the correct heat press settings is vital. An improper procedure can cause the final application to fail.
For a DTF transfer, maintain a temperature of around 300 to 320°F (150–160°C) for 10 to 15 seconds with firm pressure. When you close the press, you should feel solid resistance, indicating proper pressure is being applied.
Inconsistent Curing Temperature
A consistent temperature is crucial when curing custom DTF transfers. If the temperature is too low, the adhesive powder remains inactive and won't bond correctly. If it's too high, you risk burning the ink and the film. The ideal curing temperature for the adhesive powder is around 320°F (160°C) for 2 to 2.5 minutes. Ensure the adhesive powder melts evenly and does not remain granular.
Submitting a Wrong File Format
Using the wrong file format will not produce a perfect result. Submissions like screenshots, fuzzy photos, or sketches are unsuitable for professional printing. For the best quality, use one of the following recommended formats:
- PNG (with a transparent background)
- PDF (with embedded fonts and vectors)
- PSD (Adobe Photoshop)
- AI (Adobe Illustrator)
- EPS (Encapsulated PostScript)
These formats preserve the quality and details of your design, ensuring a crisp and clean DTF transfer.
Summary: Avoid Mistakes
Now that you are aware of the basic mistakes in DTF transfer preparation, you can avoid them. Once you are ready to submit your design correctly, you will realize how easy it is to achieve professional-quality results.
DTF Runner is all about helping you shine. Whether you're sending one logo or building a full DTF gang sheet, we've got your back with high-quality dtf prints, fast service, and friendly support. For more details, please contact us or visit our website.

Recent Post


Custom DTF Transfers