Cart
0
Table of Contents
- Understanding DTF Transfer
- Choosing the Right Graphic Software
- Setting Up Your Workspace
- Designing Your Artwork
- Preparing Your Design for DTF Transfer
- Printing Your DTF Transfer
- Transferring the Design to Fabric
- Quality Control and Troubleshooting
- Enhancing Your DTF Designs
- Marketing Your DTF Transfer Products
- Conclusion: Your Partner in DTF Printing
Direct-to-Film (DTF) transfer is a ground-breaking technology that has taken the textile printing industry by storm. It enables you to print professional-grade, robust, and high-performing prints on various types of fabric. Designing for DTF transfer using graphic software might seem a bit convoluted, but with the correct tools and techniques, you can produce some really cool, colourful designs. In this guide, we will walk you through designing for DTF-based printing with graphic software and how to prepare the best designs for optimal output.
Understanding DTF Transfer
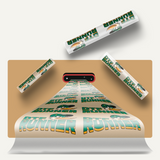
First and foremost, one should know what constitutes a DTF transfer. A design is first printed on a special film, then it is transferred onto fabric using a heat press. With this method, you can get bright colors, detailed resolution, and long-lasting prints that survive many washes. This versatility makes DTF transfers optimal for custom apparel and promotional materials.
Choosing the Right Graphic Software
Choosing the right graphic software is crucial. The software you select should allow for detailed design work and support high-resolution outputs. Here are some popular options:
- Adobe Illustrator: Ideal for vector graphics, Illustrator is perfect for creating scalable designs with clean lines and vivid colors.
- CorelDRAW: Another excellent choice for vector graphics, CorelDRAW offers robust design tools and a user-friendly interface.
- Adobe Photoshop: Best for raster images and photo editing, Photoshop is suitable for designs with complex details.
- Affinity Designer: A more affordable alternative, Affinity Designer offers a range of features comparable to Illustrator and Photoshop.
Setting Up Your Workspace
Creating a New Document
The first step in any new design is to set up the workspace properly. Create a new document in your graphic software. Ensure this document matches the dimensions of the DTF transfer film you are going to print on, typically A3 or A4 size.
Resolution and Color Mode
Set the resolution to at least 300 DPI (dots per inch) to ensure high-quality prints. Additionally, use the CMYK color mode, as it provides a more accurate representation of printed colors compared to RGB.
Designing Your Artwork

Vector vs. Raster Graphics
DTF transfer generally prefers vector graphics due to their sharpness and scalability. As vector graphics use mathematical equations to create shapes, your design remains sharp at any size. Of course, you can use raster graphics (made of pixels), especially for complex images and photos. However, make sure such images have a high enough resolution to avoid pixelation.
Using Layers
Organize your design using layers. This makes it easier to edit individual elements without affecting the entire artwork. Name your layers to keep track of different parts of your design.
Incorporating Text
When adding text, ensure it is readable and large enough. Use bold fonts for great readability. Avoid overly detailed typefaces, which sometimes do not print well. Text needs to be outlined or converted to paths to ensure the font will transfer without incident.
Adding Colors and Effects
DTF transfer is very successful in producing vibrant colors, so feel free to experiment with bold hues. Use gradients, shadows, and other effects to add depth. However, keep in mind that overly complex effects might not translate well onto fabric, so balance creativity with practicality.
Preparing Your Design for DTF Transfer
Checking for Errors
Before finalizing your design, thoroughly check for any errors. Zoom in to inspect for stray pixels, overlapping lines, or any inconsistencies. Ensure all elements are aligned correctly and that there are no unintended gaps.
Creating Cut Lines
If your design contains complex shapes or needs to be cut out, create cut lines around the elements. These lines guide the cutting process for precision. Place cut lines on a separate layer to distinguish them from design elements.
Saving Your File
Save your design in a format compatible with your DTF printer. Common formats include PNG, TIFF, or PSD for raster images and AI, SVG, or PDF for vector graphics. Ensure the file maintains its high resolution and all layers are intact.
Printing Your DTF Transfer
Preparing the Printer
Ensure your DTF printer is set up correctly and that the ink levels are sufficient. Load the special DTF transfer film into the printer, making sure it is aligned properly.
Printing the Design
Print your design onto the DTF transfer film. Follow the directions provided by your printer's manufacturer to attain the best possible settings. Let the printed film dry completely before moving on.
Transferring the Design to Fabric

Applying Adhesive Powder
Once your design is printed, apply adhesive powder evenly over the wet ink. This powder helps the design adhere to the fabric. Shake off any excess powder to ensure an even coating.
Curing the Film
Place the film in a curing oven or under a heat source to set the adhesive powder. This step is crucial for the print's durability. Follow the recommended curing time and temperature settings.
Heat Pressing the Design
First, pre-press the substrate (your garment) to remove moisture and wrinkles. Lay it on a flat surface, then place the cured DTF film design-side down. Transfer the design using a heat press, applying even pressure at the recommended temperature and time. Let it cool, then peel off the film to reveal your final print.
Quality Control and Troubleshooting
Inspecting the Print
After transferring, inspect the print for any defects. Check for color accuracy, alignment, and overall quality. Address any issues immediately to maintain high standards.
Common Issues and Solutions
If you face problems like color bleeding, poor adhesion, or incomplete transfers, review your printing and heat press settings. Ensure your equipment is functioning correctly and you are using appropriate materials. Regular maintenance is essential for consistent results.
Enhancing Your DTF Designs
Keeping Up with Design Trends
Stay updated with the latest design trends to keep your creations fresh. Follow industry blogs, participate in online forums, and attend trade shows to gain inspiration.
Experimenting with Techniques
Don't be afraid to experiment with different techniques and styles. Mix design elements, try new color schemes, and explore various effects to create unique designs.
Seeking Feedback
Take feedback from peers, clients, and customers to improve your designs. Constructive criticism is valuable for enhancing the quality of your work.
Marketing Your DTF Transfer Products
Building an Online Presence
Build a professional website to sell your DTF transfer products. Add high-quality images, detailed product descriptions, pricing, and customer reviews. Use keywords and SEO to attract organic traffic.
Using Social Media
Utilize platforms like Instagram, Facebook, and Pinterest to promote your products. Share behind-the-scenes content, design tips, and customer reviews to build a strong online presence.
Offering Customization
Provide customization options to attract a broader audience. Allow customers to submit their own designs or modify existing ones. Personalized products are highly appealing and can help you stand out.
Conclusion: Your Partner in DTF Printing
At DTF Runner, we believe in good teamwork and are here to help bring your designs to life. You can upload your designs with a click and get them printed easily. Our gang sheet builders and uploaders are effective tools at your service. Designing for DTF transfer can be a creative, exciting, and efficient process. Equipped with the right knowledge and tools, you can create stunning prints that will please your audience.
With dedication and creativity, you can master the art of DTF transfer. We believe you will achieve great things by following these suggestions. We wish you luck!


Recent Post


Custom DTF Transfers